
Reassembling a used greenhouse.
Five minutes reading this might save hours of frustration
- Offer to dismantle the greenhouse yourself because unless you are a puzzle geek, you will not have a clue how to put it back together.
- Take some photographs before taking the greenhouse down, these will help you when you are putting it back together
- Take an indelible marker and mark major pieces "Front Left Corner" etc.
- Take WD40 to help with stuck nuts and bolts, a metal hacksaw for solidly rusted parts, Spanners and pliers, some good gloves, handling glass with bare hands is dodgy.
- Before re-assembling the greenhouse, buy nuts and bolts, "W" glazing clips. I used 200 on an eight foot by six foot greenhouse, dropping most of them when they sprung back out as I was fitting the greenhouse glass.
- Take great care handling glass. Glass weakens with age and hairline cracks can cause a pane of glass to break when you least expect it.
Putting your greenhouse back together.
Tips to help Assemble a used greenhouse.
You need a clear site, not under a tree or shaded by a hedge or fence, with enough room to get all the way around the greenhouse. The base, which can be wood, concrete or brick needs to be the right size, stable, square and level. Check the level with a spirit-level. If you have a straight piece of wood long enough, check the diagonals are perfectly level.
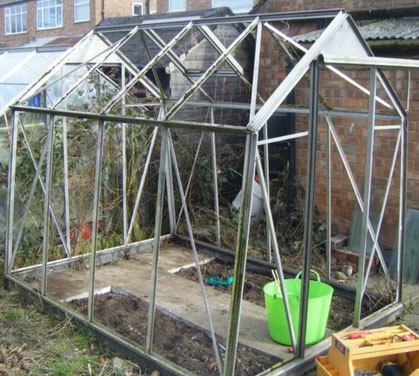
Now the fun begins, sort out the Components for the Greenhouse and try to decide which pieces go where. If you are dismantling a second-hand greenhouse, check all the bits are there and take photographs, they will be very useful later. I got halfway through erecting mine and discovered a main strut was missing.
You will find that many of the nuts and bolts are missing or unusable. Greenhouse nuts and bolts are easy to find in the local DIY store. It is best to buy spares before you start.
Erecting a Greenhouse.
Especially a large greenhouse, it is a two-person job and is best constructed in one day. Greenhouse frames are flimsy things and a half finished frame could be damaged by the wind blowing it apart and twisting the greenhouse frame.
Glazing the Greenhouse,
Having finally got the frame up, fitting the glass, is the next job. Start from the top, its easier, without the glass in the frame below you.
This is where you discover you are short of glazing clips, it is a good idea to buy a couple of packets, before you start.
You will also need buy the glass or plastic to replace those that were already broken or missing when you dismantled the greenhouse. (glass does not bend).
I started out on a trip from Bristol, where I collected my free greenhouse, with all the glass intact, only to find on arrival, most of the glass had shattered. Lesson learnt? Wrap the greenhouse glass in newspaper and stack it securely.
Anyway having learnt the hard way I thought I would pass my experience assembling my second-hand greenhouse on to you.
Other Greenhouse related pages on my site
Writing your first book or novel? This new website provides advice and tips to help write, edit, publish, market and promote it https://www.faircop.com/