How to make a wormery to produce liquid fertiliser
Questions and answers about making a Wormery
- What is a wormery?
- Which worms are suitable for keeping in a wormery?
- Which kitchen waste to use and not to use?
- Equipment needed to make a wormery?
- How to make homemade liquid fertiliser in a wormery.
- Easy to make wormery producing homemade liquid fertiliser.
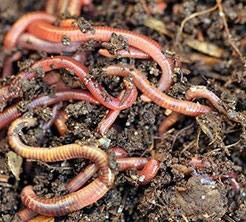
Click on the photo for more info about buying the worms
Which worms are suitable for a wormery to produce liquid fertiliser?
-
Tiger Composting Worms. The Scientific name is Eisenia fetida.
- Habitat. It is usually found in garden compost, but also in wet, decaying leaves, organic-rich soils and manure heaps.
- Diet. Eats rotting vegetation.
- Size. The adult worm is about 6cm long.
- Description. The body is stripy with dark red bands, with narrower pale pink or yellowish bands in between.
- It is the worm used in a wormery to turn kitchen waste into liquid fertiliser.
10 tips to make it really easy to produce liquid fertiliser in a wormery.

A read for rainy days
In fairy tales, there is always a
Prince Charming and a bad man. Sometimes in real life, Prince Charming is the bad man, or the
bad man turns out to be Prince Charming.
Please be aware, this is not a fairy tale. This book contains references to grooming gangs, sexual abuse, Gaslighting, and punishment of the abusers. Also NON-WOKE scrutiny of British
society.
A dark story of gaslighting, sexual abuse, retribution, and hope. Based on the author's conversations with Willow, a young girl hidden from Society, and with Richard an ex-soldier now working for
a covert agency The Organisation. This book tells how Richard confronts those in authority blocking Willow from the therapy she needs to escape from them and recover, he’s aware of the
consequences. But having ignored evil too often, he’s ready for the risks.
CLICK LINK FOR FREE READ SAMPLE Kindle version Paperback

What is a wormery? A Wormery is an easy natural system using worms to convert kitchen food waste into liquid plant feed. Worm composting is a great way of recycling vegetable scraps, banana skins and tea bags from your kitchen.
A Wormery or worm bin is simply a waterproof container housing a colony of special worms, known as brandlings, tiger worms or redworms. They are ideal for households with small or no gardens, as they produce a liquid which forms a concentrated plant food.
What does a wormery do? It composts waste using special worms known as brandlings, tiger worms or redworms and can be kept indoors. However, is probably best kept outside near your kitchen door or in a shed or garage in the winter. Even if you haven't got a garden, it is great if you want to compost vegetable scraps, and tea bags and other stuff, instead of sending it off to landfill. You will produce a small amount of compost and a liquid, which forms a concentrated plant food and is great for using in pots and containers.
You will be recycling about half of the waste that would otherwise end up in a landfill site. Saving money and reducing the use of chemical fertilisers by using homemade liquid fertiliser.
Components you will need to create a working wormery. You will need about 400 worms, a bag off gritty sand, a couple of perforated bin bags, shredded newspaper and a plastic household waste bin. The bin can be any size. However, the larger the capacity the more worms and kitchen waste you can put into it and the more liquid fertiliser you will get out.
If you intend composting a lot of kitchen waste, it is not the depth that is important. It is the surface area. So, you may be better off constructing a rectangular shaped wormery with a tap fixed into the bottom to draw of the liquid fertiliser. Or if you prefer you can drill holes in the bottom of the bin instead of fitting a tap. You will need to place the bin in a bowl or tray to catch the homemade organic liquid fertiliser.
How to construct a wormery. Drill tiny breathing holes around the top of the bin, not in the lid of the bin, this could let the rain in. Fill the bottom of the bin with 3" of gritty gravel for drainage and place perforated bin-bags over the gravel. Place four inch deep damp shredded newspaper over the bin bags. Drill the tap into the bin just above the gravel. It is a good idea to place the wormery bin on blocks to give enough space to place a container under the tap.
Putting the worms in. Make a small hollow in the shredded newspaper and place the worms inside.
Feeding the worms. Start feeding food scraps to the worms, making sure the scraps are chopped up well and placed no more than about two inches deep across the shredded newspaper. Cover the waste with a couple of sheets of damp newspaper to keep the whole thing moist. You can add more scraps when the previous lot has been eaten. How much you feed will depend on how many worms you have. Practice will make perfect so don't be put of if it gets a bit smelly simply reduce the kitchen waste. composting tips
Kitchen and Garden waste you can feed to your worms to make good safe liquid compost includes. Egg shells, coffee grounds, tea bags, cereals, fruit, annual weeds (not in seed ), bread, any green leaves, all chopped up vegetable and fruit, potato peelings and chopped up hedge trimmings, etc. For the full list of waste to feed your worms refer to my article here.
KITCHEN and GARDEN WASTE that should not be feed to worms. Include Meat and fish, Grass, Weed seeds, Diseased plants, Rice or pasta, Baked beans, Cheese, Onions, Cooked potatoes and Cat or dog muck.
Prefer to buy a ready made worm bin. A selection available here
Finally a few things to do and not to do when using a wormery
- After about four weeks, you will be able to draw off some liquid fertiliser to feed your plants and depending on the heat generated in the bin (indoors or out) compost may be ready to use after a couple of months.
- Never overheat the worm-bin thinking you will speed up the composting process, it won't and the food will start to rot.
- When you use the compost on your garden or in pots, separate out the worms and put the them back in to start all over again.
- If it gets to soggy, check that the liquid is being drawn off often enough, add a little less green stuff and a bit more brown stuff.
- If it gets dry, sprinkle water over the waste and maybe add a bit more green stuff.
- A few flies and a bit of mould inside the worm bin are normal.

Click on the diagram
You will soon get the hang of making good liquid compost in a wormery and ending up with healthy well fed plants and a lot less stuff to send to landfill. Why don't we all do it! ???
Writing your first book or novel? This new website provides advice and tips to help write, edit, publish, market and promote it https://www.faircop.com/